Level 2
To earn your merit badge (at some point, a real physical badge will be sent to you), you must document your child doing all the things on the list, the number of times listed. It is easy to do something badly one time, but a second and third time gives the child the ability to do it with more confidence, more interest, and eventually with mastery.
Bumper Badge
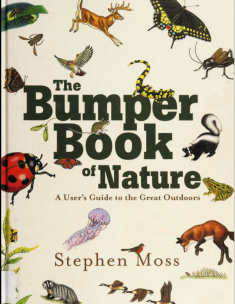
Based on the thrilling and most wonderful The Bumper Book of Nature (non-affiliated endorsement of a great book!)
- Build a den indoors
- Build an outdoor den
- Make a nature table
- Climb a tree - and hang upside down from it!
- Make a rope swing (for a tree) and swing on it
- Make a bark rubbing
- Listen to tree's heartbeat
- Identify 10 common birds
- Look for owl pellets and take them apart to find the bones
- Look for animal tracks, make a plaster of some
- Grow mustard and cress
- Stand out in the rain
- Go for a 'blind walk'
- Sit or stand still for an hour
- Play Poohsticks
- Roll down a hill
- Feed birds in your backyard and make a bird feeder
- Make a nature notebook and fill it up with drawings
- Time thunder and lightning to tell how far away a storm is
- Count the colors of a rainbow
- Skip a stone across a lake
- Visit a local wildlife sanctuary
- Learn to forecast the weather (using nature)
Orienteering Badge
Beginner Level to Middle Level. If your child falls in love with this try Geocaching and doing an official Orienteering events.
Beginner
- Indoor Orienteering Course:
Set up: Use furniture, pillows, or blankets to create a simple obstacle course indoors. Draw a map of the course on a piece of paper, marking the starting point and "finish line."
Activity: Blindfold one child and guide them through the course using verbal instructions ("two steps forward, turn left at the couch"). Once they reach the finish line, switch roles. Discuss using directional terms like "left," "right," "forward," and "backward" for navigation.
Progression: Add more obstacles or incorporate compass directions for older kids ("walk 5 steps southeast from the chair").
- Compass Games in the Backyard:
Set up: Grab a compass and head to your backyard. If you don't have a compass, you can improvise using a magnetized needle and a drinking straw.
Activity: Start with basic compass directions (north, south, east, west). Play games like "Simon Says" with directional instructions ("Simon Says touch something north of you"). Hide small objects around the yard and have them use the compass to find them based on directional clues.
Progression: Introduce orienteering symbols like triangles for north and practice following simple compass bearings (e.g., walk 10 steps due east).
- "Follow the Leader" Orienteering Game:
Set up: Choose a safe outdoor space. One person acts as the "leader" with a simple map or pre-planned route.
Activity: The leader navigates the course, following landmarks or using a compass for older kids. The others follow behind, learning to pay attention to the leader's path and referencing landmarks.
Progression: Switch roles so everyone gets a chance to lead. Gradually increase the complexity of the route or incorporate simple map symbols for older children.
- Nature Scavenger Hunt:
Set up: Head to a local park or nature trail. Prepare a list of natural objects for them to find, like different colored leaves, specific types of flowers, or different shaped rocks.
Activity: Provide a simple map of the area highlighting landmarks. The kids can use the map to navigate and find the objects on the list. Discuss using landmarks for reference and basic map reading skills.
Progression: As they get better, create a scavenger hunt with clues that involve following directions based on landmarks and distances ("walk 50 meters south from the bridge, then look for a red flower").
- Treasure Hunt in the Park:
Set up: Choose a familiar park and create a simplified "treasure map" using a hand-drawn sketch or a basic map of the park with landmarks highlighted. Mark an "X" to indicate the hidden treasure (a small toy or treat). Activity: Explain basic map symbols like paths, benches, and playgrounds. With your kids, use the map to navigate and find the hidden treasure. Discuss landmarks and cardinal directions along the way.
Progression: Gradually increase difficulty by hiding the treasure in less obvious locations or incorporating simple compass directions ("walk 10 steps north from the swings").
Middle
In a larger park, pick two points that are both visible from where you will sit and observe 5-8 miles (8-13 kilometers). Create a quick map with a few landmarks or use a premade map, if available. Tell child starting point and finishing point. Tools to be used are the map you made or have, a compass, water bottle, bug spray if needed and UV protection (hat, sunscreen). Try to mark down on your own map the path the child chooses. Time the event. Come back another day and do the same thing again (same two points), ask the child if they remember their previous path - If not show them the path you marked. Then ask if there is a different path they might use this time. Time and check which path was faster. Make sure to talk about what the reasons were - Was it because you were more familiar with the task? Was it easier to go over or around the hill?
Once you believe your child has mastered map reading, compass use and is confident in their skill, task them with the following three tasks:
- By themselves, using a map and their skills, go to the nearest store and purchase one or two small items (bread, butter, milk, so on).
- By themselves, use a bus or subway or walk to the local library to check out a book (if they don't have a library card, give them the necessary material and task them with getting one).
- By themselves, task them to meet you at an unfamiliar location. This doesn't have to be necessarily far from your house, but it does need to include a map, compass and a location, so they practice getting there on their own using their skills. Then, ask them to meet you at a similar location (or same), but use a different route - try this until you feel there is no other pather left unexplored.
Learn more about Maps
Camping Badge
Consider getting this badge during one summer of playing and living out of doors!
- collect wood
- build a fire
- cook on a fire
- collect water
- wash the dishes
- whittle
- put up a tent
- take down the tent
- clean up camping site
- Mark a trail
- cross a log bridge - build a bridge that is cross-able
- caving
- sleep by a river/ on a mountain/ beach
- Mount a summit
- sailing/paddle boarding/kayaking /canoe down a river-
- float down a stream -
- build a raft
- bike trail
- slackline
Learn more about Camping
Foraging Badge
Beginning
Here's a basic forager's checklist for beginners, including ten items that are commonly foraged, along with what to do with them:
Beginner Forager's Checklist
-
Dandelion (Taraxacum officinale)
- What to Do: Use the young leaves in salads, the flowers to make dandelion wine, and the roots for herbal tea.
-
Nettle (Urtica dioica)
- What to Do: Harvest young leaves (wear gloves!) and use them in soups, teas, or as a spinach substitute when cooked.
-
Wild Garlic (Allium vineale)
- What to Do: Pick the leaves and flowers to add a mild garlic flavor to dishes like soups, pesto, or salads.
-
Chickweed (Stellaria media)
- What to Do: Use fresh in salads or smoothies; it has a mild flavor and is packed with nutrients.
-
Clover (Trifolium spp.)
- What to Do: The leaves can be added to salads, and the flowers can be used to make tea or as a garnish.
-
Blackberries (Rubus fruticosus)
- What to Do: Pick ripe berries in late summer and use them in desserts, jams, or eat them fresh.
-
Elderflower (Sambucus nigra)
- What to Do: Harvest the flowers in late spring for making elderflower cordial, syrup, or adding to desserts.
-
Wild Strawberries (Fragaria vesca)
- What to Do: These small berries can be eaten fresh, added to desserts, or made into jams.
-
Mushrooms (e.g., Chanterelles, Morels)
- What to Do: Forage only if you are confident in identification; use them in risottos, soups, or sautéed as a side dish.
-
Pine Nuts (from Pine Cones)
- What to Do: Collect pine nuts from cones of certain pine species; they can be eaten raw or roasted and added to salads or pestos.
Important Tips for Beginners
- Identification: Always be 100% sure of a plant's identity before consuming it. Use field guides or apps for assistance.
- Sustainability: Only take what you need and leave enough for wildlife and future growth.
- Safety: Avoid foraging near roadsides or polluted areas to prevent contamination.
- Local Guidelines: Be aware of local regulations regarding foraging in parks and natural reserves.
This checklist provides a starting point for beginners interested in foraging while emphasizing safety and sustainability. Happy foraging!
Citations: [1] https://www.backpacker.com/skills/foraging/ [2] https://gallowaywildfoods.com/foraging-tips/ [3] https://www.livinganordiclife.com/post/a-beginners-guide-to-foraging [4] https://www.sagejournal.co.nz/stories/a-beginners-guide-to-foraging-a-foragers-life/ [5] https://www.bbcgoodfood.com/howto/guide/foraging [6] https://misswondersmith.com/blog/2019/introtoforaging [7] https://dahliasanddaytrips.com/foraging/ [8] https://www.gore-tex.com/blog/foraging-food-wild-plants
Following Blackforager Wishlist:
- Honewort Root for fermenting
Stargazing Badge
Join and participate in Zooniverse Plant Hunters TESS and/or Galaxy Zoo
